Jellyfishphoto - Emulsion lifts from digital files


A while back, while exploring the world of Polaroid on the internet, I ran into a printing company website called Jellyfishphoto. Jellyfishphoto uniquely markets to photographers a new way to lift photo emulsions onto alternative medium reminiscent of the Polaroid emulsion lift process using inkjet water slide transparencies. As you might imagine, I thought the idea was interesting and decided to try it out. The purpose of this post is to share my results and some information if you’d like to experiment too.
There are, to my mind, some benefits to this inkjet process, most notably 1) the ability to create a larger transfer since one is not limited to the size of the Polaroid, and 2) the overarching image appearance and output can be finely controlled via Photoshop prior to emulsion printing. Polaroid and film photography diehards may take exception, but it's clear to me that this mixed digital/analog workflow has significant creative potential here.
The process of creating the emulsion transfer is quite similar to that of a Polaroid – you soak the printed transparency in a tray of water for several minutes to soften the adhesive holding the emulsion to transparent base. The emulsion is then pushed away from the plastic base and floated onto paper or some other receiving medium. Note that the free floating emulsion looks like a jellyfish! It’s pretty simple; however, detailed video instructions are found on the Jellyfishphoto website.
My results:
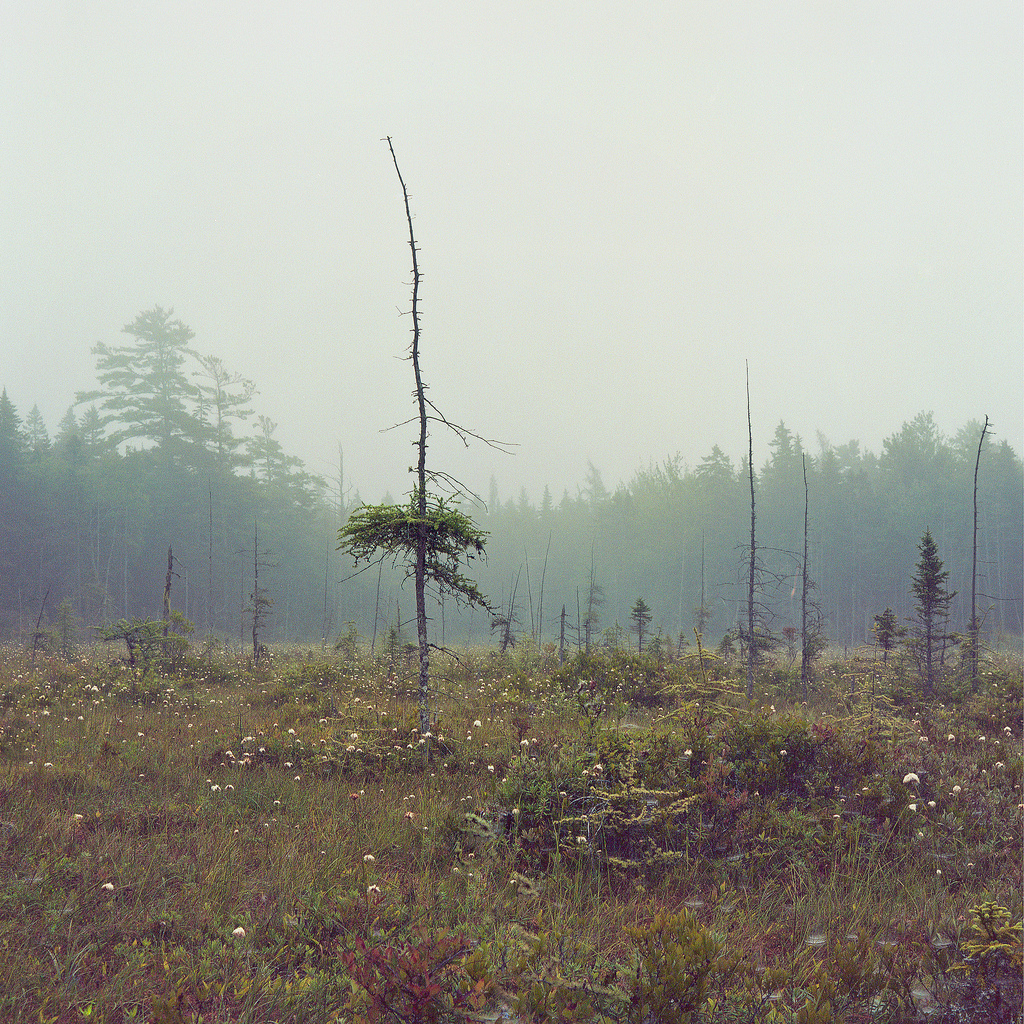
Larch ~d.j. grenier
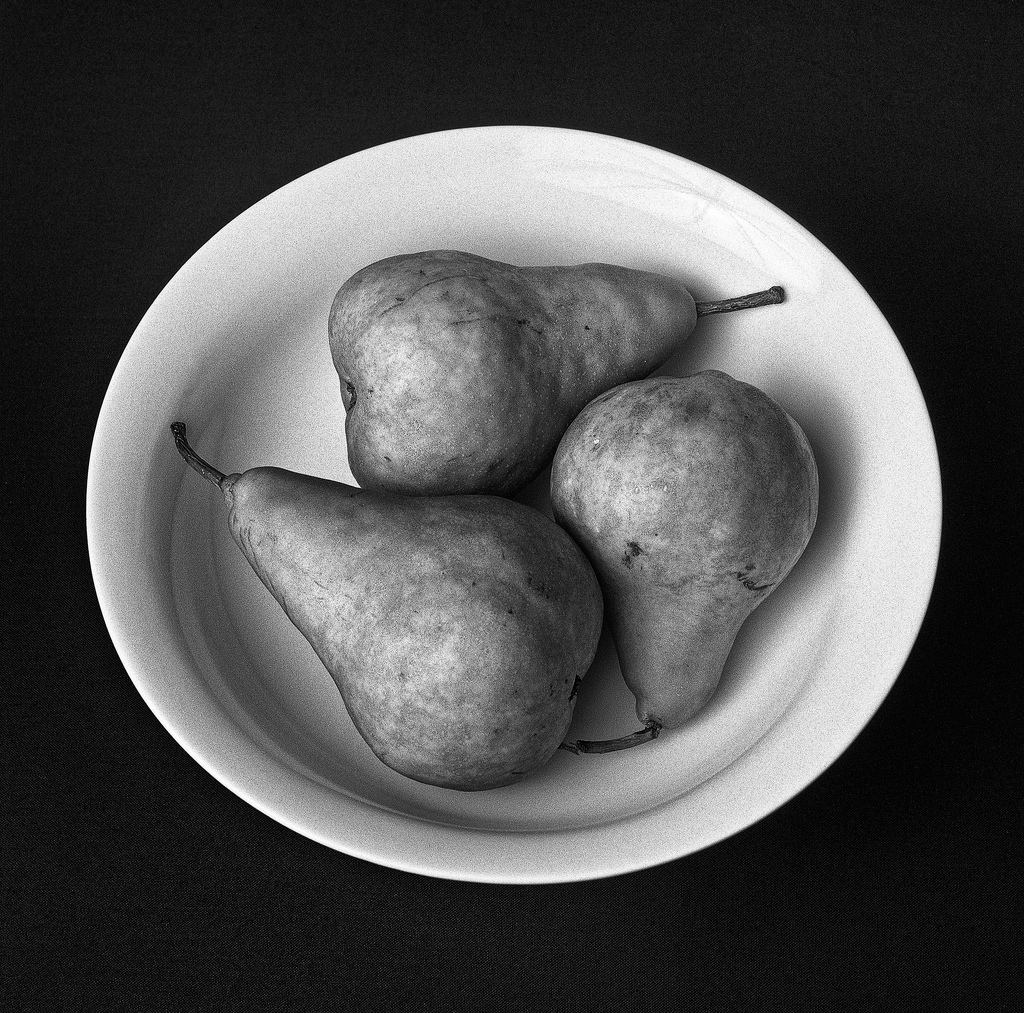
Here’s my first inkjet emulsion lift. I decided to try the process out on three separate photographs. Jellyfishphoto also gave me an off-color extra to practice with. Pedro, at Jellyfishphoto, suggested that I start with this color photograph first and then go to my black and white images since black and white inkjet lifts have shown to be more difficult.
Pears ~d.j. grenier
My second lift was less successful. It’s a high contrast black and white image that required a lot of pigment when printing the black edges. As I handled and pushed around the emulsion during the lifting process, ink actually came off, sadly creating negative fingerprint smudges on the black edges of the photo and positive smudges onto the paper.
Note the finger print marks on the corner of the photo and on the paper...
Significant loss of pigment is observed on the bottom edge of the image, which occurred during the "lifting" process.
After revisiting the instructions and product review Pedro shared, it seems that dense ink areas can be problematic, particularly with black and white photos. Resolution thus far is to try to reduce emulsion handling by slowing down and allowing the emulsion to soak longer prior to removing it from its plastic base.
Sample in a jar ~d.j. grenier
I really like this image and how the final print came out. Yes, some loss of pigment can be detected in the lower edges of the photograph; however, this does not prove too distracting to my eye in this instance. What fun!
Watercolor paper...
Paper texture detail...
I chose to mount my inkjet emulsion transfers "classically" onto watercolor paper; i.e., in the vein of the Polaroid examples one mostly encounters. That said, part of the brilliance of using inkjet emulsion is that creativity is limited only by imagination. True Polaroid examples can be found online showing photo emulsion adhered to glass, cups, plates, beer cans, and other vessels, wall paper, scrapbook paper, rocks, and tree leaves.
Google search results for "Polaroid emulsion transfers"
For those interested, below are my medium format negative scans used to make these transfers for comparison.

Some final thoughts: These inkjet emulsion transfers were enjoyable to create. The hands-on process feels good, and two of my three final prints look pretty good. Careful handling is required due to potential ink loss and bleed from the emulsion, something that would not occur with Polaroid or Impossible film. I should also point out that the central idea is to manipulate the emulsion to meet artistic vision, thus the inkjet process currently does have limitations as a result of its delicate nature. That said, I believe that there is great creative potential with this process given the right project and the proper images. I look forward to exploring more. If you have questions, don't hesitate to reach out.
I am not affiliated with Jellyfishphoto in anyway. These views are my own.
Don't undertake a project unless it is manifestly important and nearly impossible. ~ Edwin Land
I've been shooting a bit, most recently, with the Impossible Project's instant integral film in old Polaroid cameras. Though quite experimental in nature, some photographers are getting phenomenal results with Impossible film. Really nice stuff with a lot of potential... After seeing a video explaining how to create an image by lifting the emulsion from a Polaroid print onto another substrate, I had to give it a try.
This is my first emulsion lift made using the Impossible Project's PX 680 Color Protection instant film onto Canson Montval watercolor paper.
Orange, lemon, and lime
~ Daniel J. Grenier
Here's another of my attempts at an emulsion lift, using a photograph made with a Polaroid SX70 SLR camera, the Impossible Project's PX 100 Silver Shade First Flush instant film, onto Canson Montval watercolor paper.
Pears in the kitchen
~Daniel J. Grenier
Finally, for those interested, here's a Youtube video I ran into that outlines how to do an emulsion lift. What Fun!
(Fair warning - the music in the video is a bit over the top.)